We all want to generate as many quality leads as possible with as low a spend as possible, and one of the best ways to do so is to ensure you're capturing data from as many website visitors as possible.
To do so, you need two things: stuff people want (content, events, promotions, new product or feature releases) and lead capture forms.
In this blog, we’ll explore what lead capture forms are, best practices, and how to set them up in Ortto. Plus we’ll share 7 use cases for generating high volumes of quality leads.
Lead capture form definition
A lead capture form collects information from your website visitors with the hope of converting them into customers. Forms may be embedded on your site, a landing page, social platforms, or can appear in pop-up widgets.
Lead capture forms best practices
There are a number of things to keep in mind when building your lead capture forms. These five guiding best practices offer a strong start, but it’s important to keep your goals, form type, and the benefit to the customer in mind and conduct tests to find out what works for you.
1. Strike the right number and type of form fields
Shorter forms generate more leads, but the quality of the leads may be lower (when visitors are willing to provide more information, it’s more likely they are genuinely interested in your product or services), and personalizing your nurture emails and other communications will become difficult with limited information. Instead of having a ‘shorter is better’ mentality, take a goldilocks approach: Not too long, not too short, just right.
Start with a long list of every field you would ideally like to have created. First consider the information you can’t live without, like email and first name, and put those in the ‘yes’ basket. Then consider which pieces of information could be completed by a data enrichment tool like Clearbit. If that’s something you have implemented, remove those fields. Look at what’s left and make a decision about what will be required to ensure follow-up communications are relevant and personalized. For B2B, this could be something like business type or size. For ecomm, this could be specific to your product, like skin type.
Now you should have a list of fields that generates a good volume of quality leads.
2. Get specific with targeting and timing
When using lead capture forms in pop-up widgets, it can be tempting to show your lead capture forms to anyone and everyone who visits your site. But even if this does result in more leads, you’ll get more annoyed visitors in equal measure.
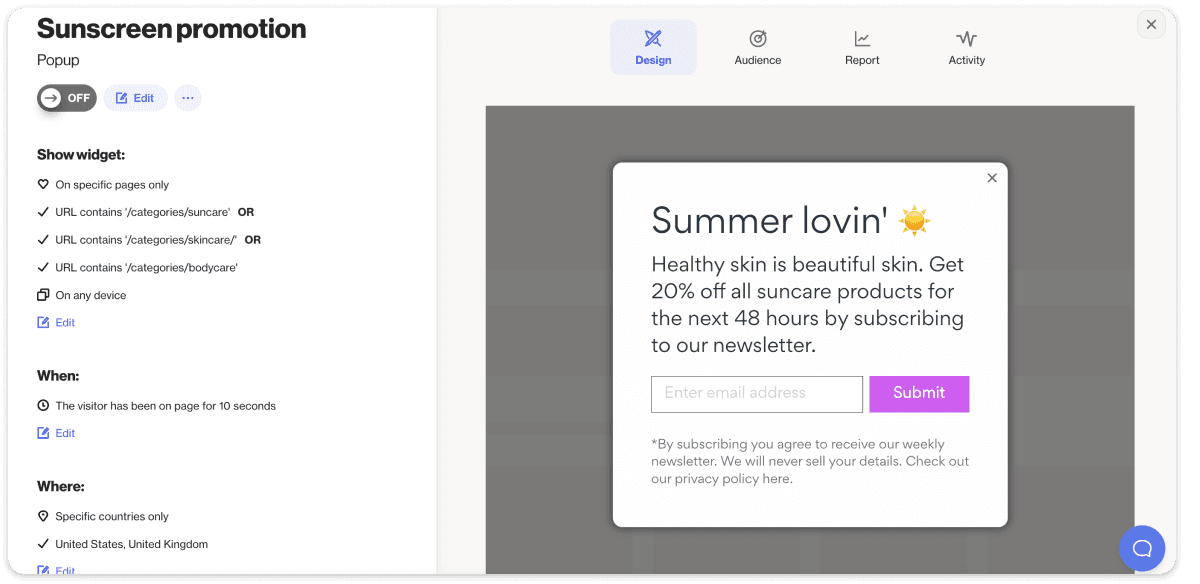
Instead, consider the pages that are most relevant to target, and the timing. For example, if you are an ecommerce store selling a wide range of beauty products and brands and you have a June sale on sunscreen as a part of a summer promotion, you may choose to show the pop-up to people in the US and UK who have been browsing the sunscreen, body care, and skincare pages or individual product pages for at least 10 seconds.
This way, you can make the promotion feel relevant and personalized. Plus, you can promote other offers, events, or content on other pages across your site.

3. Choose the right form type and placement
Ortto customers have 8 different options for capture widgets, all of which can include some form elements. We’ll go through how to set these up in more detail below, but before you even start, you should consider the best form type and placement for the job.
First, consider the fields in your form and how they’ll fit in the widget type. For example, a Bar that appears at the top of your website like below can include a field for an email address. This can be great for simple messages like discount codes that appear when a visitor displays exit intent. But if you want to add more fields than that, it will quickly start to look cluttered.
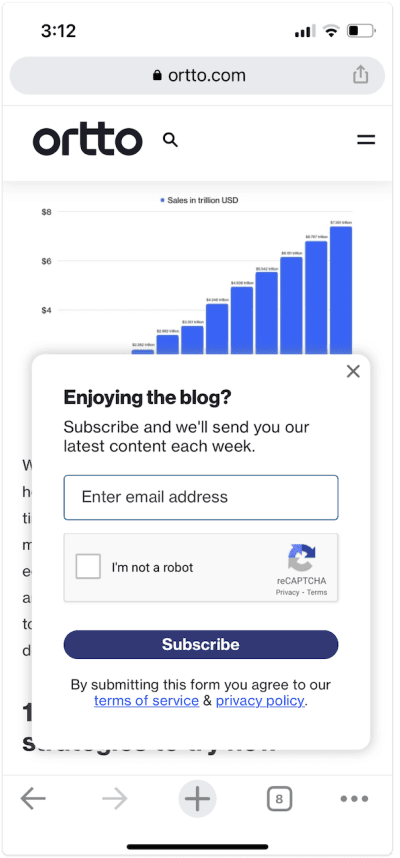
Now let’s consider the placement. Let’s say you are aiming to grow your newsletter subscribers. Your newsletter mostly contains blog content, so you intend on serving the lead capture form when a visitor has been on a blog page for more than 15 seconds. A visitor who is in the middle of reading a blog is going to be frustrated if a pop-up appears in the middle of the screen, interrupting their flow.
Instead, you should look to lead capture forms like a notification that appears in the bottom right corner or a banner that appears mid-stream on the page. It’s likely a good portion of your traffic comes from mobile, so ensure that the form type and placement make sense on the small screen, too.

4. Keep it secure
Stop missing out on leads because their privacy concerns are not addressed. Linking to your privacy policy and making it clearly available on your website is a simple way to ensure you abate any hesitations visitors have around handing over their information.
To protect your own business email list from being filled with spammers, secure your forms with a CAPTCHA widget. While this is an additional step for your leads, it’s generally appreciated as a security measure and will save your business a major headache down the track.
5. Test different CTAs
Your call to action will look different depending on the campaign and form type. Ebooks could be ‘Download now’, webinars and events may be ‘Register now’ and subscription forms could be ‘Subscribe’. Consider what makes the most sense for your form, and test variations across different forms to see what works.
You’ll also want to make sure the button stands out, and you may want to test a few different CTA button colors to see what stands out and performs on site. This is not a time to be tricky — keep it simple and create a button that actually looks like a button so that your visitors don’t have to go looking.
7 ways to use lead capture forms in your marketing
Now it's time to put these best practices into action, with seven ways to use lead capture forms in your marketing.
1. Generate ebook or whitepaper downloads
When you’ve gone to the trouble of writing and designing an ebook or whitepaper, you want to shout about it and generate high-quality leads with it. A lead capture form is a perfect addition to your other marketing activity.
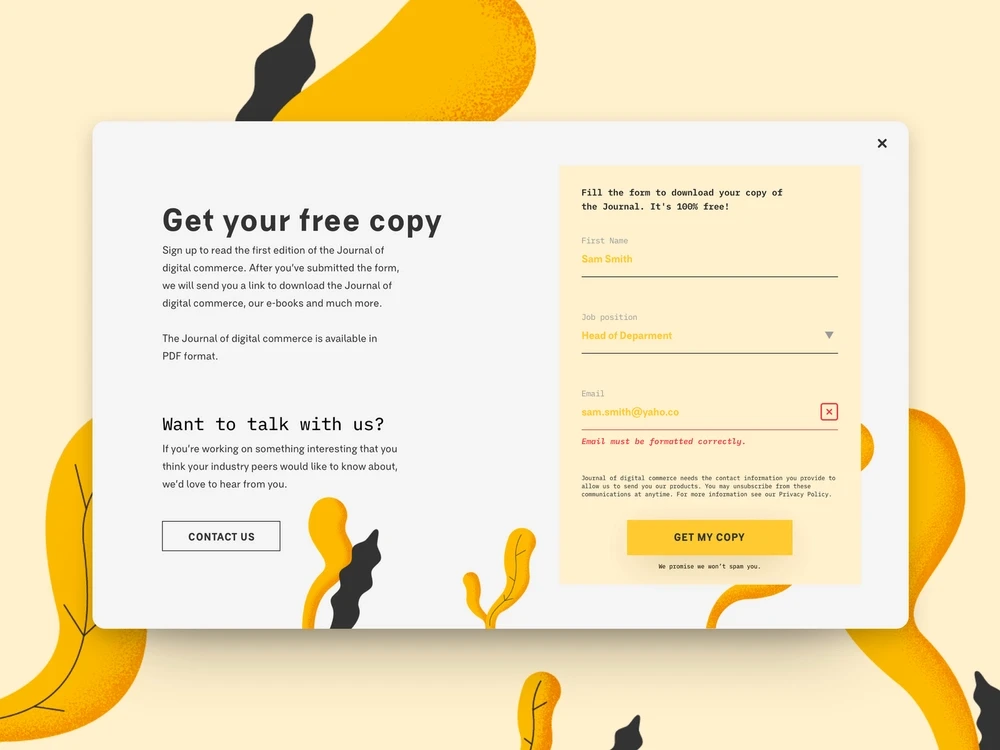
You’ll want to use an embeddable lead capture form in your eBook landing page to capture anyone who finds it through organic or paid search, social media activity, or links from blog pages.

Image source: Dribble
Then, you can set up pop-ups that appear on relevant blog or website pages after a visitor has been browsing for at least 10 seconds. Make sure to include the following information on the form:
Title and topic of the eBook
A clear ‘Download eBook’ CTA
Image of the eBook cover
Link to privacy policy
Checkbox if you will be sending these leads additional marketing material or newsletters (outside of the eBook download)
Keep it short and sweet, but remember to clearly explain the benefit to the visitor and what makes your eBook valuable. After all, there’s plenty of ungated information on the internet you’re competing with.
2. Register event or webinar attendees
Whether you’re hosting an event, webinar, or online live demo of your product, using a lead capture form to generate more registrations and attendees is a must. Again, it’s likely you will want to use an embeddable lead capture form on your webinar landing page, but you can also use widgets like bars and notifications to remind people to register for the event.
Include the following information on your form:
Date and time of the event
Location of the event
Topic and any star guests
Clear CTA to ‘Register now'
Privacy policy
Checkbox if you intend to send marketing information outside of event registration confirmation, reminders, and relevant post-event information (e.g. a recording of a webinar).

3. Tease a new product or feature
Tease a product, brand, or feature that’s coming soon and offer early access to subscribers to quickly grow your subscriber list. Your customers will love feeling like they’ve got an exclusive, and you will benefit from an early indication of how successful your new offering will be, and how much additional marketing you may need to do to reach your goals.
This tactic can be great for lead generation, especially if your new feature fills a gap that proving to be a barrier to conversion, you are stocking a new, well-known brand, or launching a hotly anticipated product. But it’s also great for keeping your most loyal customers happy, so make sure to show the lead capture form to existing customers as well as unknown visitors.
The size and placement of the lead capture form will largely depend on how hotly anticipated the launch is. Let’s say it’s a major collaboration between two fashion brands. This kind of thing may well be deserving of the splashy takeover form, where a smaller feature or product would be better placed in a pop-up on the homepage.
4. Grow your newsletter list
If you have a newsletter, actively grow your list by using a lead capture form that appears on blog pages, customer stories, and any other relevant content pages. Asking for a lot of information from newsletter subscribers can be jarring — after all, they’re subscribing to receive your newsletter every week, they’re not asking for personalized marketing messages to be sent their way. So do your best to keep it simple.
If you do have multiple versions of your newsletter, whether for different industries you serve as a B2B or different verticals as an ecommerce site, add a field to ensure you are sending the right email to the right person. If you offer a daily, weekly, and monthly option, ensure you are capturing the subscriber's preference here too. Other than that, an email address and name are all you should need.
Remember to be upfront about how often the new subscriber will receive your newsletter and set up a welcome flow with double opt-in to maintain your domain reputation.
5. Share relevant information and answers
Maybe you have a complicated product or offering, or you’ve identified a frequently asked question among visitors. Instead of using a lead capture form to simply generate leads, you can really connect with your visitors by asking them what you can help with.
Start by creating a notification form with a few different options that visitors can select from. Whichever option they select can send them down a lead nurture path, sending relevant information to the visitor.
For example, let’s say you’re a company that sells indoor plants online. You could ask, ‘On a scale of 1-3 how much of a hands-on plant parent are you?’. Your visitor might select ‘1 - it’s a miracle if my plant survives’ or ‘3 - I’m a helicopter parent when it comes to my plants.’
Let’s say a visitor selects 1. You can then set up a nurture journey to share low-maintenance plants, self-watering pots, and other gizmos and gadgets that make keeping your plant's health effortless.
There are so many different uses for this, it’s all about getting creative and having some fun with it.
6. Offer a discount before a visitor exits
Exit intent discount codes are a great way to recover almost-lost customers, and setting them up in Ortto is incredibly simple.
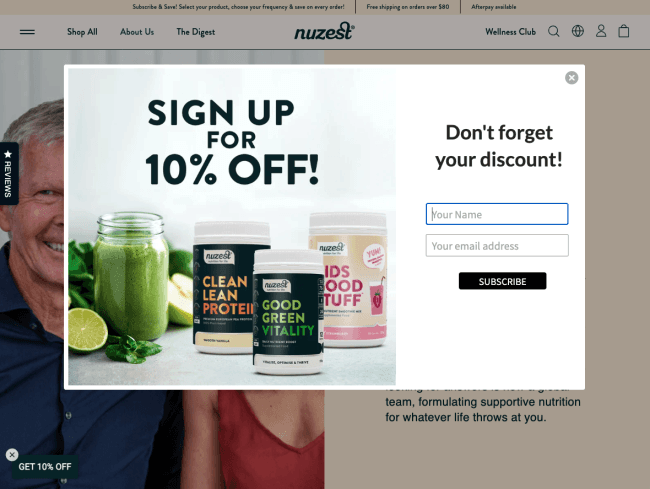
Use an engaging, attention-grabbing widget like the pop-up or Spin the Wheel to generate leads while offering your visitors a discount code, free shipping, gift with purchase, or another mystery offer.

In Ortto, setting up an exit intent widget is simple. Just select ‘The visitor displays exit intent’ option under ‘When’ and the pop-up will be displayed when the visitor moves their mouse outside the browser window.
7. Offer a demo or 1:1 advice
If you’re a SaaS or B2B with a sales team or a smaller B2C company with a high-priced product, a simple lead generation form asking the visitor what your support or sales team can help them achieve or solve can be incredibly powerful.
This form should be three to four fields maximum. Name, email, and the question the visitor wants answered or problem they want solved. Be clear about how and when your team will be in contact (for example, within 48 hours, over email), and make sure you are only sending other marketing information or newsletters if the lead checked a relevant box on the form confirming they wanted to receive this information.
From here, your support or sales team will simply need to check the leads generated and respond to them 1:1. Is it time-consuming? Yes. Is it powerful? Incredibly. No one wants to purchase a big ticket item online without getting all their questions answered, and this simple form will go a long way to increasing leads and conversions.
How to create lead capture forms in Ortto
If you’re an Ortto customer, building lead capture forms is incredibly simple and, in many cases, takes less than five minutes. In Ortto you’ll find all our lead capture forms in the ‘Capture’ section of the platform. You can start from scratch with a blank canvas, or use templates like Subscribe notification, Subscribe pop-up, Blog subscribe, or Subscribe to SMS notification.
For the sake of this how-to, let’s assume you’re starting from scratch. The first thing you’ll be asked to do is choose from one of Ortto’s eight different types of capture widgets:
Bar: Appears at the top of a web page as a full-length bar, best for pinning important announcements (like webinars) and driving new subscribers
Popup: A traditional popup window that grabs attention and helps you grow your mailing list.
Notification: A pop-up in the bottom right corner of the webpage that is great for making announcements about events, webinars, or sales and driving subscribers to your blog or emailing list
Takeover: Use sparingly for your biggest and most important messages. Removes all distractions to get the full attention of your visitor and grow your mailing list.
Banner: Appears as a mid-stream banner pop-up to grab attention and share important information.
Spin the wheel: A gamified discount wheel to drive subscribers and sales. Most often used for capturing ecommerce customers, but can be used by any business type.
Form: A form that can be embedded anywhere on your website or elsewhere to drive new subscribers.
Tracked form: This is available to capture form submissions from any existing form you have on your website or elsewhere - we won’t be referring to this feature here, but you can learn more about it in this blog.
Once you’ve chosen your form type, you’ll want to select which pages and devices to show your pop-up, and when. As mentioned above, this is all about identifying the most relevant pages and giving visitors some time to browse (10 seconds is a good guide, but content-rich pages like blogs may be longer) before they are hit with a pop-up.
Next, you’ll want to choose where and who sees the form or pop-up. If your form is going to be embedded into a landing page, that will most likely be globally and everyone. But if you are looking to target females in the US, you can drill down.
Finally, select how frequently your visitors should see the lead capture form. As a default, this is set at once per session, or until they convert, and it never expires. This will be highly dependent on the type of form and the goal.
With all your settings done, it’s time for the fun part. Use the fields to update images, text, form fields, fonts, colors, and more. Remember, don’t get too tricky here. The aim of the game is to generate leads, and often simpler is best.
Once you’re all set, simply switch the form ON and watch as your leads start pouring in. You’ll be able to watch the number of people who have seen the form and conversion rate in the report tab, and track all leads in the Audience section of the campaign. You can then target this audience with nurture emails, retargeted ads, SMS, or other pop-ups and forms.
Final word
Lead capture forms are an essential part of every marketing team’s sandbox. After all, they are the simplest way to turn unknown visitors into known visitors and, eventually, customers.
Ortto makes building lead capture forms incredibly easy. Sign in or sign up today to get started.


